Wednesday, July 15, 2015

How to Make a Beaded Cap and Leather Tassel

Leather fringes and tassels are hot this season!! I am not quite ready to don anything with fringes but I would love to wear a simple yet trendy leather tassel necklace.

List of Materials:
Leather fringe
Five 4mm rose montees
Size 8/0 and 11/0 seed beads 
One 2-in head pin (preferable 24 gauge)
Any 6mm bead
Fireline size D
Two size 10 needles
Super glue and a clip
Chain

Techniques: Two-needle right angle weave and circular netting


I got this pack from Hobby Lobby.


There are two flat sheets of leather fringes per pack.


Roll the top of the leather sheet  tightly. A couple dots of Super NEW GLUE are added on the top edge of the leather.  Clip the top until the glue is dried.  


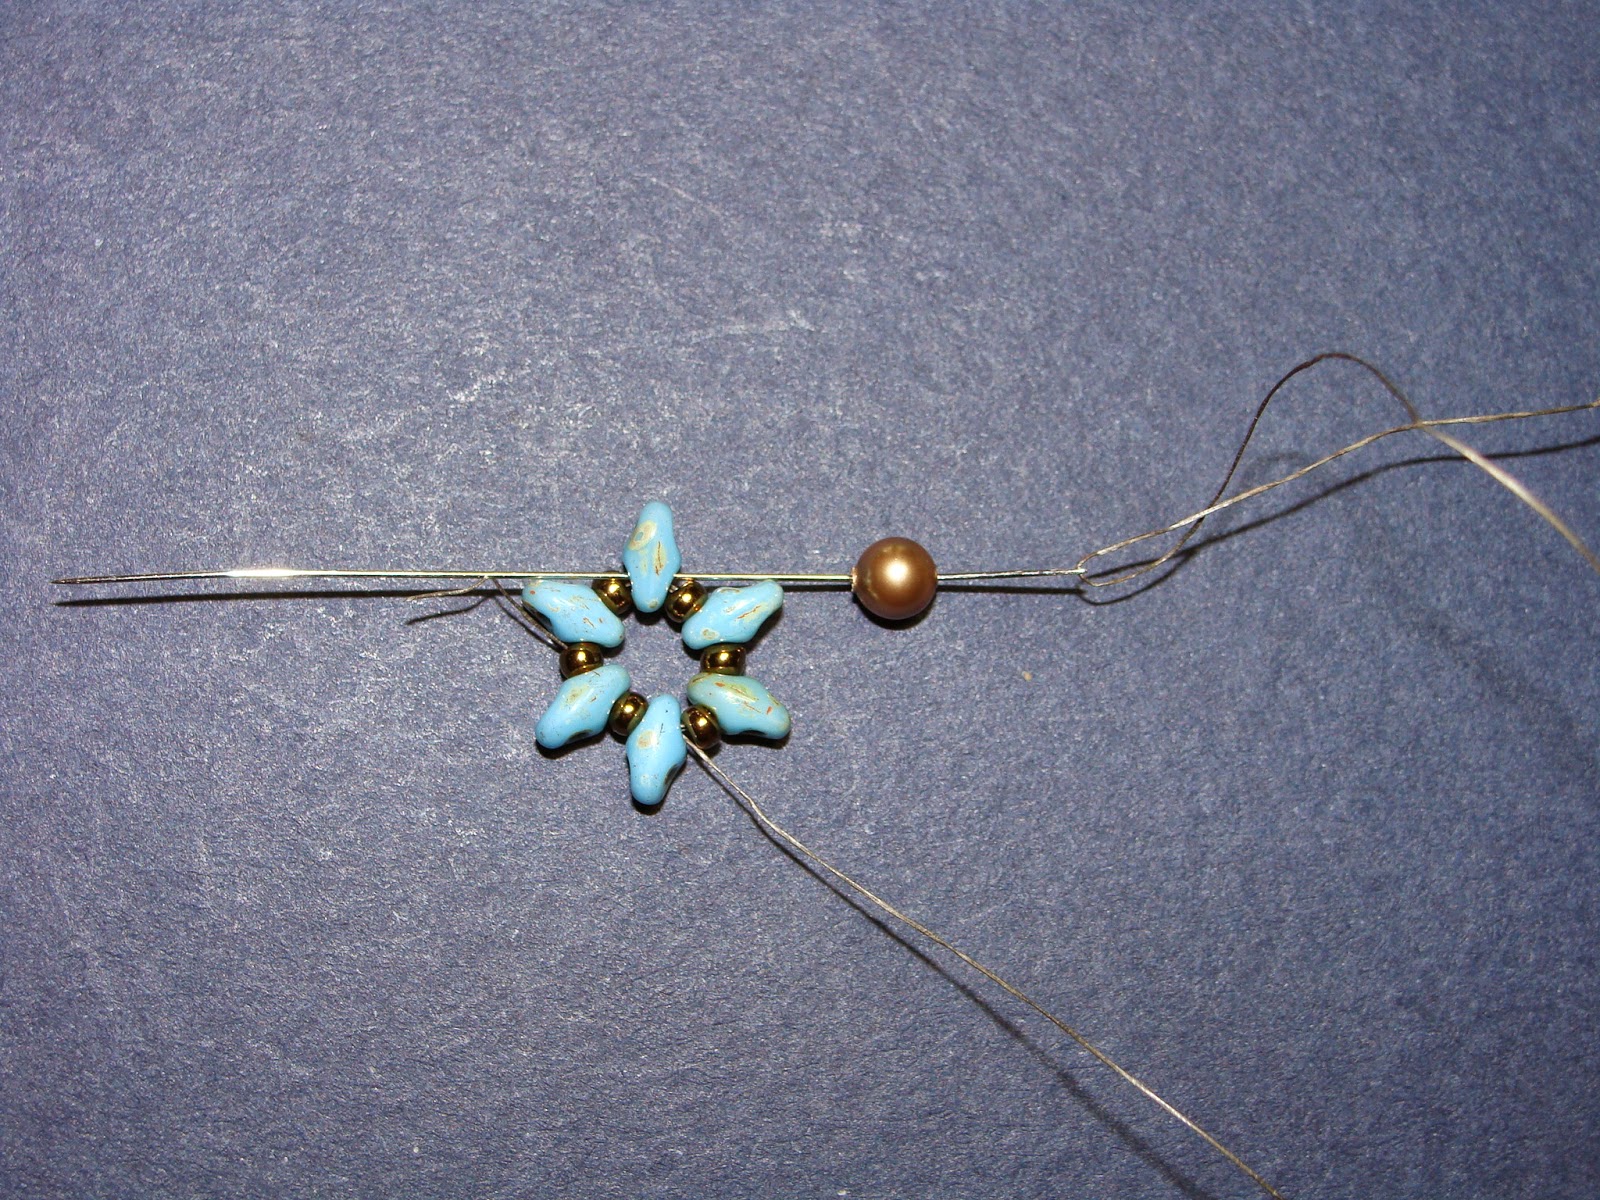
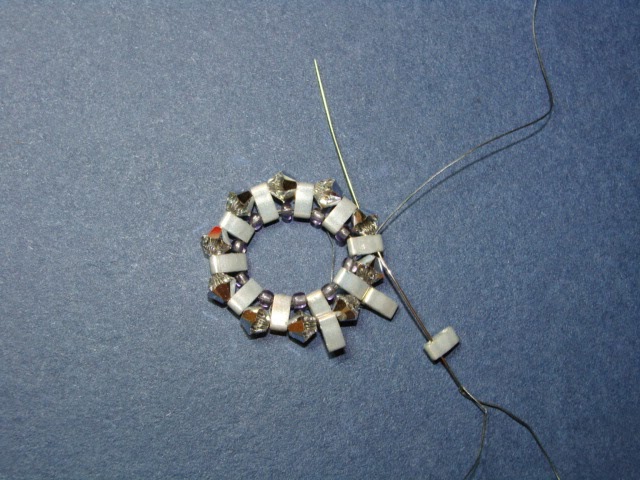
Step 1: In the meantime, begin with about 24 inches of Fireline, thread a needle on each end. Pass needles across the X of a montee in oposite directions (cross weave). Slide the montee to the middle of thread.


Step 2: Pick up an 11/0 with each needle. Pick up a montee, cross weave through the X. Repeat this step until a total of 5 montees are added.


Step 3: Close the circle by cross weaving through the first montee.


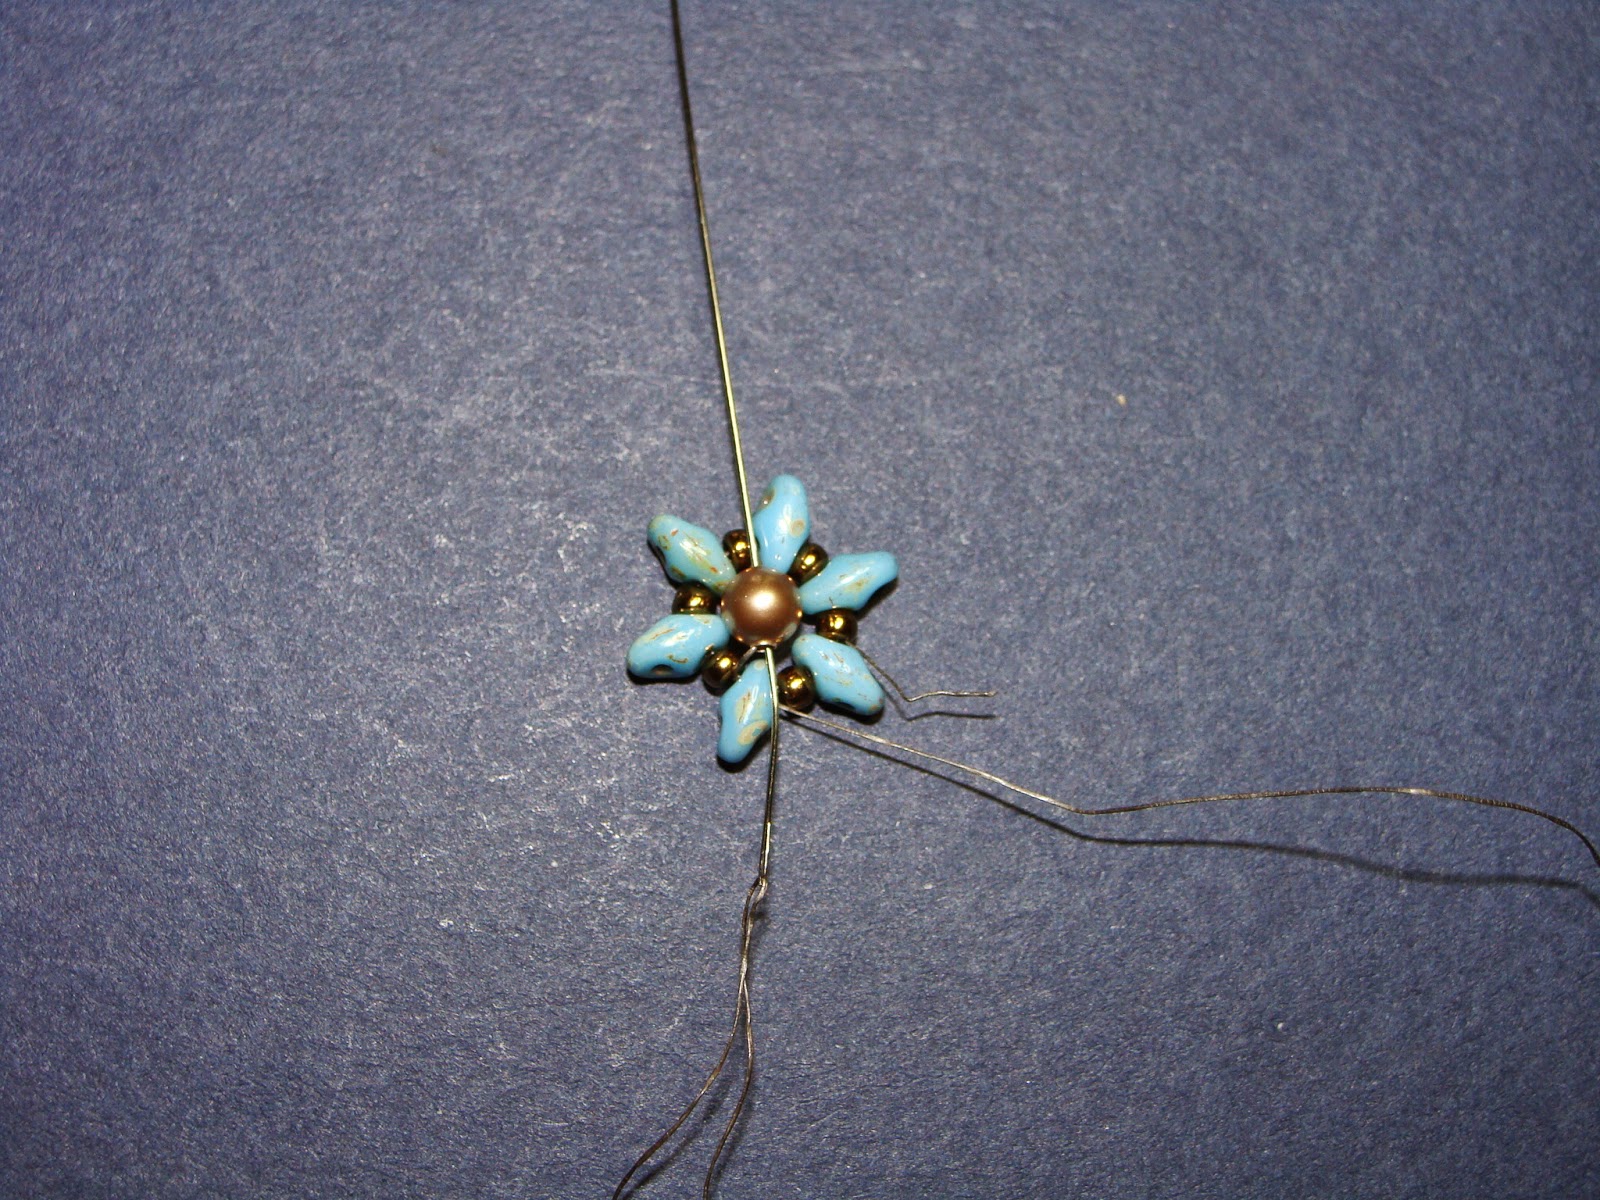
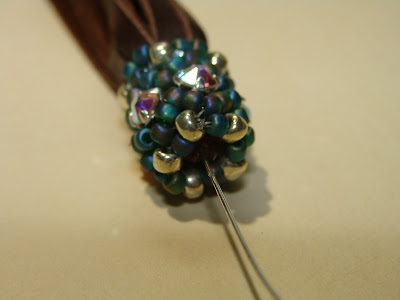
Step 4: Slide the circle on the top of the tassel. One needle will be used at a time from this point on, use the other thread to keep the tension tight. With thread exiting an 11/0 in the circle, pick up three 11/0. Pass through the next 11/0. Repeat this step until all 5 montees have a loop of 3 seed beads on top. After picking up the last three 11/0's, pass the thread through the first 11/0 of the circle. Move needle through the first and second 11/0's of the first loop.


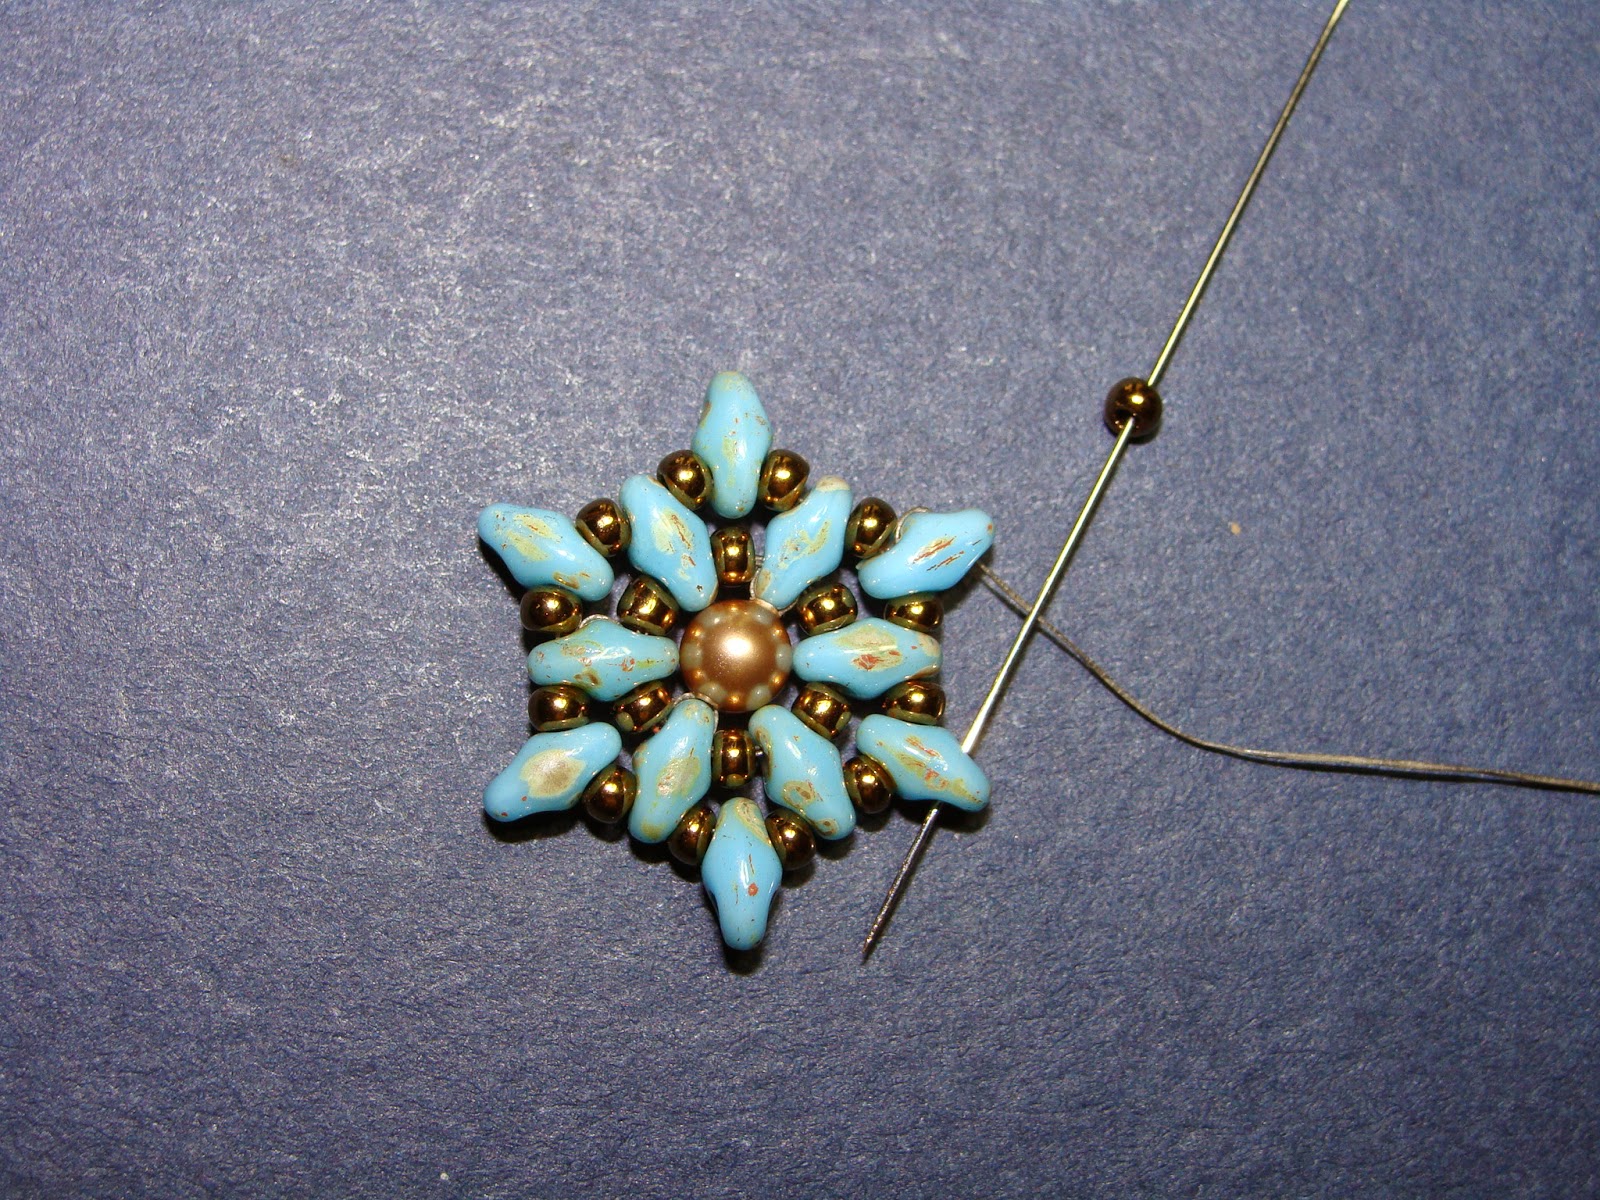
Step 5: Pick up an 8/0, pass through the second 11/0 of the next loop. Repeat this step until a total of five 8/0's are added. After the last 8/0 is picked up, pass thread through the second 11/0 of the first loop. Pass thread through the first 8/0, pick up an 11/0 then pass through an 8/0. Repeat this step until a total of five 11/0's are added. Pass thread through all 11/0's and 8/0's a couple more times. Pull tight to close the top of the cap. Tie half hitch knots in between the beads. Trim the extra thread.


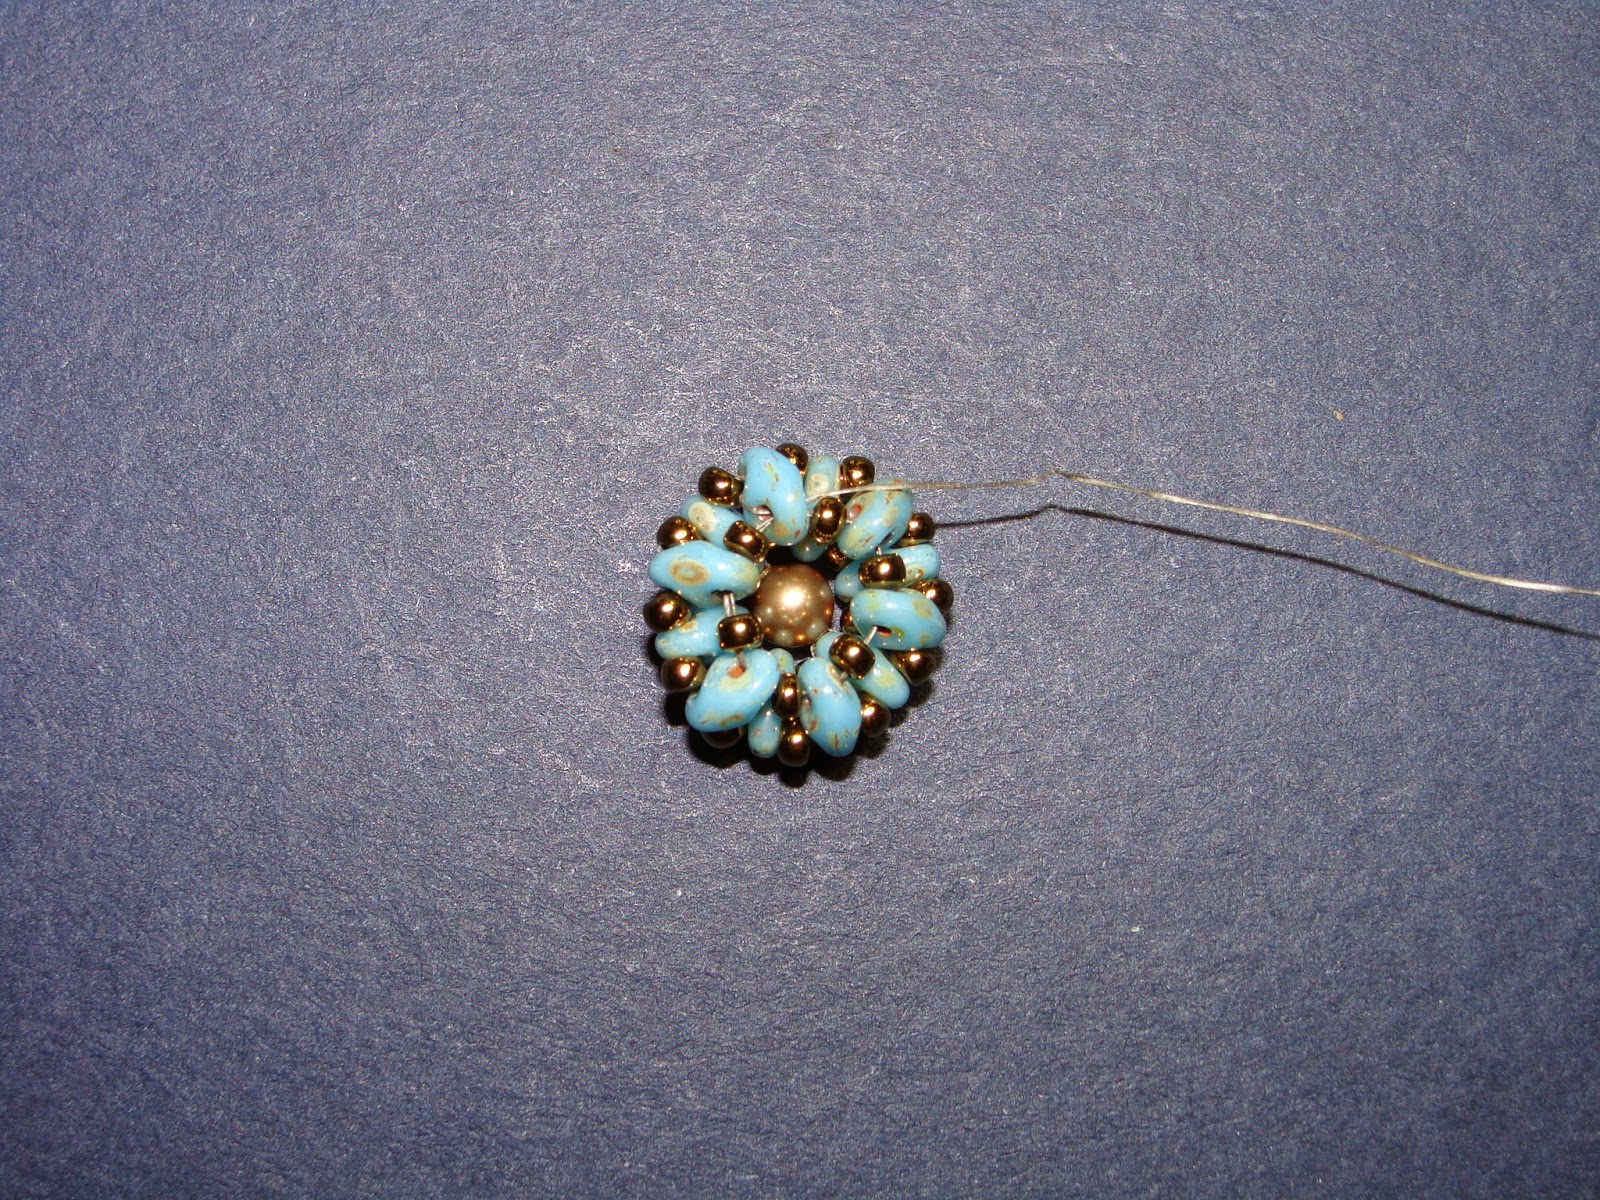
Step 6: Use the other needle. Repeat steps 1 - 5 for the bottom part of the cap. For the last row, instead of adding one 11/0, add two 11/0's.


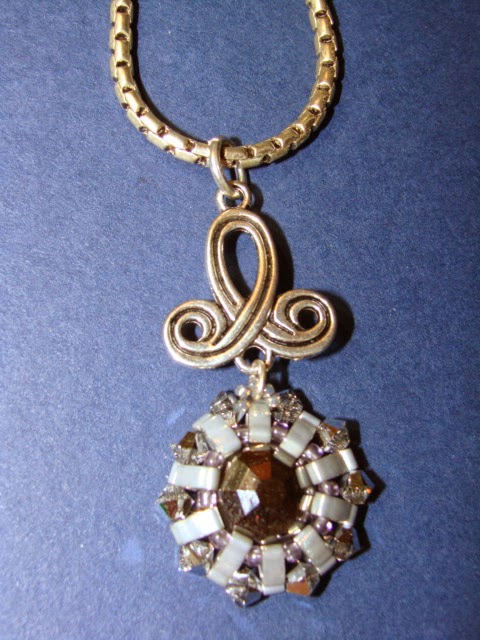
Step 7: Making a wire loop for the tassel - Slide an 8/0 into the head pin as a stop bead. Insert the head pin. 


Add in a 6mm bead of your choice to cover the top part of the tassel. Make a wrapped loop.


Tuesday, January 6, 2015

Super Quick Reversible Earrings With SuperDuos

                                                                                                 
                                          Happy New Year!
Every year, around November, I started thinking about what to make for loved ones for Christmas: scarves, cowls, necklaces, or bracelets?? I began with big, elaborated ideas! Then as the holiday came closer, my plans became quick one-day projects. The idea for the Winter Blooms earrings came to mind when I got a call from an unexpected guest on Christmas Day :-). The pair of earrings took me about half an hour to make minus the time for threading, which seemed to be forever when I was in a rush, and gift wrapping.

Materials needed for the earrings:
24 SuperDuos
Size 11/0 seed beads
Six 4mm round Swarovski pearls


Step 1: String 1 SuperDuo, one 11/0 six times. Form a circle by tying a double knot then go through all beads one more time.


Step 2: With working thread exiting a SuperDuo, string a pearl and pass needle through the opposite SuperDuo.


Step 3: Pass back through the pearl and through the SuperDuo where first strung the pearl.


Step 4: Move thread to the outer hole of a SuperDuo. String one 11/0, one SuperDuo, one 11/0 and pass through the next SuperDuo. Repeat 5 more times. Finally, pass thread just through a few beads (You want to leave room to insert the wire in a SuperDuo later). Then step up to the outer hole of a SuperDuo.  Keep the thread tension not too tight nor too loose.


Step 5: String an 11/0 and pass through the outer hole of the next SuperDuo. Repeat 5 more times. 


Step 6: Pass thread through all beads a few times and pull tightly to close up the circle.


Step 7: Repeat step 2 to add the pearl. Then, tie half hitch knots in between beads.


I used 24-gauge wire. It is small enough to go through the hole of the SuperDuo.


Make a wrapped loop. Insert a pearl then make another wrapped loop.


Winter Blooms Earrings


I decided to make a matching bracelet.


6 mm pearls were used in between the flowers.


Winter Bloom bracelet


Sunday, October 26, 2014

How to attach a bead cap to a beaded Kumihimo or crochet rope

So far I haven't been to a bead store that carries everything I need to complete a project. Most of the time, I went in the store with a certain idea or a color scheme in mind. After an hour of browsing and searching, I walked out with materials for a completely different project because I couldn't find the right size and complement color beads or correct findings to finish a piece of bead work.
My dilemma this time was looking for a two inch 24-gauge head pin to attach the bead cap to a Kumihimo necklace. I had to resort to the craft wire. Other gauges would work, but I prefer size 24 gauge wire; it is not too thin nor too thick to bend and wrap. Sometimes, the alternative works out better. I now prefer attaching the bead cap this way since it doesn't pull and tug the bead like my other tutorial.


Step 1: Cut about 3 inches of wire.


Step 2: Insert the wire in the middle of the braid as close to the beads as possible.


Step 3: Trim the extra threads. Bend the wire upward.


Step 4: Wrap the wire around the braid a couple of times. Insert the bead cap and make a wrapped loop.


Friday, August 1, 2014

A Quick Way to Bezel a Swarovski Rhinestone with Half Tilas

Awhile back I purchased a couple bags of Tilas but I haven't gotten a chance to use them. Now come the half Tilas...I have been working with SuperDuos on several projects so it's time to shift gear and try the half Tilas. I just discovered that my local bead store also carries Swarovski rhinestones called solaris, hexagon shaped crystals. With the angular cuts and facets, I thought the half tilas would be perfect to bezel the 14mm rhinestone.


Step 1: With almost a yard of Fireline, string a pattern of one 11/0 seed bead, one half Tila for a total of 10 half Tilas and 10 seed beads. Form a circle by tying a double knot. Go through all beads again to reinforce and also to hide the knot inside a bead. Pull thread tightly. Trim the tail thread.


Step 2: Move working thread to the upper hole of a Tila. Pick up a 4mm bicone, pass through the next Tila. Repeat this step until all 10 bicones are added. This is the front of the bezel.


Step 3: With working thread exiting a Tila, pick up one Tila and pass back through the previous Tila.


Step 4: Pass through a bicone, a tila. Pick up another Tila and repeat step 3. After adding 10 Tilas, move the working thread to the upper hole of a Tila just added in step 4.


Step 5: Let's work on the back of the pendant. 
Pick up a seed bead, pass through a Tila added in step 4. Repeat until all 10 seed beads are added in between the Tilas. Insert the solaris then pull thread tightly. Go back through all beads to tighten the circle and to keep the solaris in place. 

Step 6: With thread exiting a Tila in the back of the pendant, pick up five or seven (depends on how big the jump ring that you use to attach the bail) seed beads to form a loop. Go through the Tila and the seed beads about three times to reinforce the loop. With the extra thread, retrace the thread paths to reinforce your work. Tie half hitch knots in between beads. Trim the thread.


I thought one of these connectors that I got at Hobby Lobby would look nice and unique as a bail for my new pendant.


Back of pendant: Since I used a small oval jump ring to attach the pendant to the bail, I strung five 15/0 seed beads to make the loop.


Front of pendant: The bail is pretty fancy and the crystals are very sparkly, so I decided to keep the pendant simple.


Monday, July 28, 2014

Color Here, Color There, Color Everywhere!

    A couple weeks ago, I taught a beading class to a group of wonderful ladies. Seeing them choosing and putting colors of seed beads and crystals together: antique rose, deep rich burgundy, fun and flirty orange...I realized I had learned something important from them. I learned to be bolder with my color choices. I also realized that I sometimes painstakingly tried to match the colors, it turned out to be a waste of time after seeing my focal bead blended in too much with other beads that it lost its luster. That evening I went home and  reassessed some pieces of jewelry that I made awhile ago.  The Victorian Pearl pendants, for example, could use a "make-over".


Before
After

I think the focal of the pendant now really stands out  and I am very pleased with the outcome. Size 8/0 gold seed beads were replaced with purple. Also, instead of size 3mm Czech beads, size 11/0 were used.


Before
After


http://design-seeds.com is a great and free resource that I recently subscribed. Each day, I get a couple of inspiring palettes of colors emailed to me.

Wednesday, July 2, 2014

"Kate" Statement Necklaces


Using SuperDuos, rivolis size 14mm and 12 mm, seed beads size 11/0 and 15/0, three components are made.


Connecting the three components, a pendant is formed.


"Kate" Statement Necklaces
Inspired by the jewelry collection of Kate Spade of New York